Softimage Resources: plugins, scripts, compounds and shaders
All 1119 entries of the Softimage Resources as a simple list, 901–950 on this page. To search and filter by tags, use the interactive Resources page.
Neighbor Points Plus osAll ICE
Neighbour Points Plus 1.6 expands on the PointNeighbors attribute that's native to
ICE by letting you select 'n' levels of neighbouring points. You can select the number
of levels you want, filter the results and/or exclude the original points.
local backup: Neighbour Points Plus.1.6.xsicompound nb_points_plus_1.6.scn
local backup: Neighbour Points Plus.1.6.xsicompound nb_points_plus_1.6.scn
Track ICE Particle osAll ICE python controllers
Get a null to follow a specific particle's position and orientation. Multiple points
can be tagged in multiple clouds. The positions are worked out in global space and
nulls are dumped at the scene root.
local backup: ice_track_particle_v1.0.3.py
local backup: ice_track_particle_v1.0.3.py
author link: http://julianjohnsonsblog.blogspot.com
Plot ICE Particles to curves osAll ICE curves python
This script plots tagged ICE particles to curves. For each point cloud it creates
a null at the scene root and places the curves under that null. To use, just tag points
and run the script. A dialogue will let you select the frame range and step size.
local backup: ice_particle_plot_v1.0.0.py
local backup: ice_particle_plot_v1.0.0.py
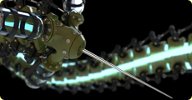 Quaternion Spine winAll rigging python
 This Softimage Plugin creates a curve with Nulls on it that You can use to rig or
weight directly to them. the orientation of the nulls is defined by the curvetangent
and the the base and target objects orientations. The system offers 720 degrees of
freedom in twisting and offers a much better twist distribution compared to the softimage
spine system.
The tool work very well for things like spines, tentacles, long necks and stuff like that.
The systems orientation is along the Y axis. As it uses the global kinematics of xsi You should carefully plan and test the parents. Too deep parenting or orientation constraints can cause problems. For this I want to enable a short quaternion interpolation in later releases if You need deep parenting and not 720 degrees twist. Right now it runs only on 32 bit.
Output: The offset matrix, scaling, rotation, translation and rotation quaternion.
local backup: MM_QuaternionSpine.zip (MM_Quaternion.dll + MM_QuaternionSpine.py)
The tool work very well for things like spines, tentacles, long necks and stuff like that.
The systems orientation is along the Y axis. As it uses the global kinematics of xsi You should carefully plan and test the parents. Too deep parenting or orientation constraints can cause problems. For this I want to enable a short quaternion interpolation in later releases if You need deep parenting and not 720 degrees twist. Right now it runs only on 32 bit.
Output: The offset matrix, scaling, rotation, translation and rotation quaternion.
local backup: MM_QuaternionSpine.zip (MM_Quaternion.dll + MM_QuaternionSpine.py)
author link: http://www.booyabase.de/?p=206
Symmetrize Hair winAll python symmetry hair
A little plugin to symmetrize hairstyles on the YZ plane. Hope it saves You some time
to get out earlier. The operator works only with hair on clusters.
Installation: 1. You need a working python installation for xsi — 2. Just drop it into Your plugins directory, workgroup or user plugins — 3. Restart XSI or reload Your plugin directory
How to use: 1. Before You use it push the Stretchy Button — 2. You can find it under the shape tools (Found no way to embed it into the hair tool bar) — 3. Freeze the hair.
local backup: MM_SymmetriceHair.zip
Installation: 1. You need a working python installation for xsi — 2. Just drop it into Your plugins directory, workgroup or user plugins — 3. Restart XSI or reload Your plugin directory
How to use: 1. Before You use it push the Stretchy Button — 2. You can find it under the shape tools (Found no way to embed it into the hair tool bar) — 3. Freeze the hair.
local backup: MM_SymmetriceHair.zip
author link: http://www.booyabase.de/?p=203
Match Shape winAll python workflow
This little tool copies the point position data from one object to another. Both objects
should have the same topology.
Installation: 1. You need a working python installation for xsi — 2. Just drop it into Your plugins directory, workgroup or user plugins. — 3. Restart XSI or reload Your plugin directory —
How to use: 1. Select the object You want to copy to — 2. Animate>Shape>MM_MatchShape — 3. Pick the object You want to copy
Some options: Plot generator level animation — Place external modified shapes in the secondary animation stack — Copy modeling modifications from one object to the other.
local backup: MM_MatchShapePlugin.zip
Installation: 1. You need a working python installation for xsi — 2. Just drop it into Your plugins directory, workgroup or user plugins. — 3. Restart XSI or reload Your plugin directory —
How to use: 1. Select the object You want to copy to — 2. Animate>Shape>MM_MatchShape — 3. Pick the object You want to copy
Some options: Plot generator level animation — Place external modified shapes in the secondary animation stack — Copy modeling modifications from one object to the other.
local backup: MM_MatchShapePlugin.zip
author link: http://www.booyabase.de/?p=68
Reset Shape winAll python js workflow
Might be an old one but still very useful... This tool allows you to remove any shape
modifications of the tagged points.
Installation: 1. You need a working python installation for xsi — 2. Just drop it into Your plugins directory, workgroup or user plugins. — 3. Restart XSI or reload Your plugin directory
How to use: 1. Select the points You want to snap back to the default shape. — 2. Ctrl + select the shape key — 3. Animate>Shape>MM_ResetShape.
local backup: MM_ResetShapePlugin.zip (MM_ResetShapePlugin.py + js version MM_ResetPoints.js)
Installation: 1. You need a working python installation for xsi — 2. Just drop it into Your plugins directory, workgroup or user plugins. — 3. Restart XSI or reload Your plugin directory
How to use: 1. Select the points You want to snap back to the default shape. — 2. Ctrl + select the shape key — 3. Animate>Shape>MM_ResetShape.
local backup: MM_ResetShapePlugin.zip (MM_ResetShapePlugin.py + js version MM_ResetPoints.js)
author link: http://www.booyabase.de/?p=37
 OBJ Sequencer winAll js workflow importer interop
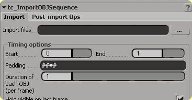
 OBJ sequencer works by importing a numbered sequence of OBJ files and essentially
keying render/view visibility.
Other options include weld open edges, relax, put inside of a model or refmodel.
local backup: TC_OBJSequencer.xsiaddon
Other options include weld open edges, relax, put inside of a model or refmodel.
local backup: TC_OBJSequencer.xsiaddon
author link: http://thiagocosta.net
TC Sketch 1.1 winAll js
Like the grease pencil tool for Maya, this tool lets you draw with the sketch tool
for 2d animation/per frame annotation.
local backup: TC_sketch_v1_1.xsiaddon
local backup: TC_sketch_v1_1.xsiaddon
author link: http://thiagocosta.net
TC AddChannels winAll js workflow
Using this tool you can add multiple channels at once to the active pass.
local backup: TC_RenderTools.xsiaddon
local backup: TC_RenderTools.xsiaddon
author link: http://thiagocosta.net
Find Offset between Objects osAll ICE
ICE compound to find the offset between two transform matrices. Will be helpful to
create constraint compensation for future constraints.
Input:
- Offseted object global or local transform (Matrix) - the parented object
- Other object global or local transform (Matrix) - the parenting object
Output:
- The offset matrix, scaling, rotation, translation and rotation quaternion.
local backup: Find Offset between Objects.xsicompound
Input:
- Offseted object global or local transform (Matrix) - the parented object
- Other object global or local transform (Matrix) - the parenting object
Output:
- The offset matrix, scaling, rotation, translation and rotation quaternion.
local backup: Find Offset between Objects.xsicompound
author link: n/a
Swap XYZ osAll ICE
Super simple compound to swap and zero vector components. Convenient if you happen
to be doing a lot of shuffling of channels - like Y position to wind Z velocity for
example. Or if you just want to quickly zero the Y.
local backup: Swap XYZ.xsicompound
local backup: Swap XYZ.xsicompound
author link: n/a

SimpleSSS osAll shader mentalray shadercompound
An example shader compound to show how to use MIA material with a SSS compound.
BR>
local backup: MiaSimpleSSS.xsirtcompound
local backup: MiaSimpleSSS.xsirtcompound
author site: n/a
SkinSSS osAll shader mentalray shadercompound
This is a conversion of the misss_fast_skin_phen Phenomenon, but it does not use the
Material output port type. It works with FG and GI, and can be customized based on
your needs.
Bug fixes :
- Weight for epidermal was overridden by diffuse weight.
- Lightmap_diffuse is linked to Diffuse now.
- Back Scatter Depth parameter was missing
local backup: 29472-SkinSSS.xsirtcompound
Bug fixes :
- Weight for epidermal was overridden by diffuse weight.
- Lightmap_diffuse is linked to Diffuse now.
- Back Scatter Depth parameter was missing
local backup: 29472-SkinSSS.xsirtcompound
author site: n/a
Camera Incidence osAll shader mentalray shadercompound
Publisher's Description. An incidence shader compound that works with displacement.
local backup: CameraIncidence.xsirtcompound
local backup: CameraIncidence.xsirtcompound
author site: n/a
Camera Projector osAll shader mentalray shadercompound
A shader compound to do camera projection of textures onto objects.
Features: Daisy-chaining for easy multi-projection setup Edge feathering with a falloff curve Include or bypass the texture's own alpha.
Usage: 1. Import the shader compound into the rendertree — 2. Open the PPG and click »Link Camera« and select the camera (or any other object with kinestate) to link the projection to. — 3. Twiddle the parameters
The projection is orthographic and the width/height is specified in SI units.
local backup: Camera_Projector.xsirtcompound
Features: Daisy-chaining for easy multi-projection setup Edge feathering with a falloff curve Include or bypass the texture's own alpha.
Usage: 1. Import the shader compound into the rendertree — 2. Open the PPG and click »Link Camera« and select the camera (or any other object with kinestate) to link the projection to. — 3. Twiddle the parameters
The projection is orthographic and the width/height is specified in SI units.
local backup: Camera_Projector.xsirtcompound
author site: n/a
Particle Billboard Texture osAll shader mentalray shadercompound
A simple shader compound to do particle billboards with a profile curve fade over
age percentage.
local backup: Billboard_Texture.xsirtcompound
local backup: Billboard_Texture.xsirtcompound
author site: n/a
Alpha Replace osAll shader mentalray shadercompound
This compound provides the ability to replace the alpha within an RGBA color stream.
It includes multiple replacement sources, gain, fader, inversion, and boolean options.
It is very useful when working with Layers.
To install copy to: %XSI_USERROOT%SoftimageXSI_7.0DataRTCompounds or any Workgroup equivalent.
The compound will then be available via the Render Tree Preset Manager. Shader will be available under Color Channels. There's a comprehensive description inside the compound.
local backup: Alpha Replace.1.7.xsirtcompound
To install copy to: %XSI_USERROOT%SoftimageXSI_7.0DataRTCompounds or any Workgroup equivalent.
The compound will then be available via the Render Tree Preset Manager. Shader will be available under Color Channels. There's a comprehensive description inside the compound.
local backup: Alpha Replace.1.7.xsirtcompound
author site: n/a
Gain osAll shader mentalray shadercompound
This Shader Compound provides advanced level/gain control for use in the Render Tree.
There's a comprehensive description inside the compound.
local backup: Gain.1.2.xsirtcompound
local backup: Gain.1.2.xsirtcompound
author link: n/a
Simple Gain osAll shader mentalray shadercompound
This Shader Compound provides basic level/gain control for use in the Render Tree.
There's a comprehensive description inside the compound.
local backup: SimpleGain.xsirtcompound
local backup: SimpleGain.xsirtcompound
author link: n/a
Normal Map Control osAll shader mentalray shadercompound
Uses the new Normal Map 2 node with the Red and Green channels separated so that you
can flip them individually, and it has color correction control so that you can adjust
the image contrast to increase or decrease the height of the normal effect.
local backup: Normal Map Control.xsirtcompound
local backup: Normal Map Control.xsirtcompound
author link: n/a
Edge Enhance osAll shader mentalray shadercompound thickness
Plug »Edge Enhance« into a material slot to highlight the edges of your
geometry. The Exposed inputs will allow you to quickly control the edge thickness
and how much it wraps around the object (using it's lighting).
I usually use it in the incandescence slot but you have to turn the Incandescence intensity up or it won't show.
local backup: Edge Enhance.xsirtcompound
I usually use it in the incandescence slot but you have to turn the Incandescence intensity up or it won't show.
local backup: Edge Enhance.xsirtcompound
author link: n/a
Fill Volume Evenly osAll ICE voxelize
Fills an object with particles spaced at the specified XYZ offsets.
local backup: Fill_Volume_Evenly.1.1.xsicompound
local backup: Fill_Volume_Evenly.1.1.xsicompound
author link: n/a / source: The Area
Spreadsheet Passes Queries osAll shadingworkflow vbs
Not working for current versions of Softimage. When you create some passes in your projects, it is sometime laborious to modify rendering
parameters especially if you want to synchronize some of them. Of course, if you select
more than one pass, when you edit the rendering options in the properties panel, modifications
will be applied to all of them, except for some paths. But it is interesting to have
a global view of your settings for all the passes at once, just before you start rendering
for verification purpose or for last minute changes. This is the main purpose of this
Add-On.
local backup: SpreadsheetPassesQueries.v1.1.xsiaddon
local backup: SpreadsheetPassesQueries.v1.1.xsiaddon
ShapeMaps win32 vbs
Not working for current versions of Softimage. In Softimage|XSI you can link WeightMaps and Shapes to control their areas of influence.
However you can't link TextureMaps with Shapes yet. From this situation, the idea
of this add-on came up. It allows you to link an image or an animated sequence of
images, as an ImageClip to a Shape with several modes.
The first idea was to directly link TextureMaps with Shapes, because they are exactly what we need, a link between ImageClips and UVs. However currently the XSI SDK doesn't allow us to access the UVs referenced by a TextureMap. So the link will have to be manually created between the Shape, the UVs set and the ImageClip. [..]
Continue reading on the download page.
local backup: ShapeMaps.v0.1.xsiaddon
The first idea was to directly link TextureMaps with Shapes, because they are exactly what we need, a link between ImageClips and UVs. However currently the XSI SDK doesn't allow us to access the UVs referenced by a TextureMap. So the link will have to be manually created between the Shape, the UVs set and the ImageClip. [..]
Continue reading on the download page.
local backup: ShapeMaps.v0.1.xsiaddon
 Generate Objects By Volume osAll ICE voxelize
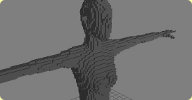
 Generate Objects by Volume (aka RedMan) - with this you can generate objects (box,
sphere) inside another object's volume - like in the ICE CoolStuff movie around 4min.
local backup: Generate objects by Volume.1.2.xsicompound readme.txt
local backup: Generate objects by Volume.1.2.xsicompound readme.txt
author site: http://streaker.thetastudio.pl (archive)
Generate 3D Point Grid osAll ICE particle voxelize
Generates a three dimension grid of points by specifying the number of points and
the spacing in each dimension. You need to connect this node to a port on the ICE
Tree node of an empty point cloud. In this version I removed shift cloud's center
from (0,0,0) - so now it's aligned to scene center, also exposed values let you move
whole cloud in XYZ.
local backup: Generate 3D Point Grid Update.xsicompound readme-3dpg.txt
local backup: Generate 3D Point Grid Update.xsicompound readme-3dpg.txt
author site: http://streaker.thetastudio.pl (archive)
Delete Particle By ID osAll ICE particle
This compound takes in a list of particle IDs (integers) and deletes them from the
point cloud.
Here is a script that can be used if you have this compound installed. Select the particles
you want to delete and run it.
local backup: Delete Particle By ID.xsicompound
local backup: Delete Particle By ID.xsicompound
author link: http://www.steven-caron.com
Deletes or Keeps Points by ID osAll ICE particle
This compound Deletes or Keeps points by specified IDs. Keep = delete all points and
keep only those specified by IDs (inverted delete). To keep or delete more than one
point/particle, just connect an Integer to the free (new(ID)) port.
local backup: Deletes or Keeps Points by ID.xsicompound
local backup: Deletes or Keeps Points by ID.xsicompound
author link: n/a
Delete Particles by Distance osAll ICE particle
Delete particles by the average distance of neighbor particles. Useful to kill particles
if they get too close to each other.
local backup: Delete Particles by Distance.xsicompound
local backup: Delete Particles by Distance.xsicompound
author link: http://thiagocosta.net
Spring Effect osAll rigging ICE
This is taken from here: http://softimage.jp/xsi/7/video/ice.html — It makes
a spring motion effect based on the particle's original emit location.
local backup: Spring.1.0.xsicompound
local backup: Spring.1.0.xsicompound
author link: http://darkvertex.com
 Procedural Fluid Flow osAll ICE particle scene fluids
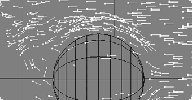
 These compounds give some fluid motion to your particle simulations. The main advantage
is to avoid »gutters« where particles accumulate.
It is an »ICE translation« from the Siggraph paper »Curl-Noise for Procedural Fluid Flow« by Robert Bridson, Jim Hourihan and Markus Nordenstam.
Go to Task > Procedural Fluid Flow to find all the compounds. There is also a sample scene showing how to combine those compounds to create a basic wind tunnel effect.
local backup: Procedural_Fluid_Flow.rar
It is an »ICE translation« from the Siggraph paper »Curl-Noise for Procedural Fluid Flow« by Robert Bridson, Jim Hourihan and Markus Nordenstam.
Go to Task > Procedural Fluid Flow to find all the compounds. There is also a sample scene showing how to combine those compounds to create a basic wind tunnel effect.
local backup: Procedural_Fluid_Flow.rar
mia_x Render Channels osAll shader mentalray shadercompound
In Autodesk XSI7, we've got the mia_x shader. It gives us multi-outputs that we can
plug in some XSI RenderChannels. I like this new shader a lot but I dislike the way
to setup all the outputs in the render tree. Too many things to do. XSI is not so
good to deal with Channels as it is with Passes. The exact opposite of Houdini where
passes can be long to setup but exporting a shader parameter is just as simple as
clicking on an export button :) . So I setup a Render Tree compound to quickly create
those outputs. All the mia_x channels are already in the compound. I use some PPGLogic
in this compound, so you just need to turn on the output you want to automatically
create the corresponding channel and add it to the current pass.
This script by Nassos Yiannopoulos lets you conveniently set up the render tree for this shader. Select the material in the render tree window and run the script.
local backup: mia_x Render Channels.xsirtcompound
This script by Nassos Yiannopoulos lets you conveniently set up the render tree for this shader. Select the material in the render tree window and run the script.
local backup: mia_x Render Channels.xsirtcompound
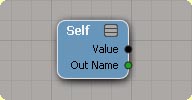 Self osAll ICE private
 Tired of typing »Get Da« and then »Self« ? Here is an advanced
ICE node for advanced ICE users ;)
Windows users can drag this link on an ICETree graph
(Content is highly proprietary so compound had to be protected from inspection!)
Windows users can drag this link on an ICETree graph
(Content is highly proprietary so compound had to be protected from inspection!)
author site: http://frenchdog.wordpress.com
Physical Sun and Sky Setup Tool osAll shader mentalray workflow
If you have used the Physical Sun and Sky in Maya and Softimage, you may have noticed
that in Softimage the setup is halfway done. Only the sky is created, no lens shader
is used and the Sun is using a soft light shader instead of the physical sun shader.
If you want to have a setup similar to Maya you have to connect everything manually. I got tired of connecting all the shaders manually so I have modified the Initialize sky shader script to include all those changes.
local backup: PhysicalSkyAdvance.xsiaddon
If you want to have a setup similar to Maya you have to connect everything manually. I got tired of connecting all the shaders manually so I have modified the Initialize sky shader script to include all those changes.
local backup: PhysicalSkyAdvance.xsiaddon
Override By Particle ID osAll ICE particle
Sometimes it's really handy to override a specific ICE attribute for a handful of
specific particles.
local backup: Override By Particle ID.1.0.xsicompound
local backup: Override By Particle ID.1.0.xsicompound
author link: http://darkvertex.com
Strandoodle osAll ICE strands particle curves
See video clip on vimeo - Perhaps you can use this to grow some stems or tubes by animating one or more nulls,
or do handwriting by path-constraining your nulls to premade curves like in the above
example.
local backup: Strandoodle.1.0.xsicompound
local backup: Strandoodle.1.0.xsicompound
author link: http://darkvertex.com
AF_kVolume osAll ICE particle
This compound is for »killing« (deleting) particles that are inside/outside
of a geometric volume. If you have particles that are flying away, and maybe they're
out of camera and you don't need them, you could have this node kill the ones that
venture into the cosmos which is good because fewer particles = faster playback.
It's also a simple, good example of using »If« nodes.
local backup: AF_kVolume.1.0.xsicompound
It's also a simple, good example of using »If« nodes.
local backup: AF_kVolume.1.0.xsicompound
author link: http://darkvertex.com
Particle Accelleration osAll ICE particle
This compound calculates the particle acceleration with the simple equation F/M. (you
need to have Force and a Mass applied to the particles prior to the execution of this
node).
Acceleration can be used for attributes in the render tree or ICEtree. The acceleration node creates attributes for Acceleration Vector (the direction), Length (the amplitude) and IsAccelerating. IsAccelerating will calculate the state of the current frame in relation to the previous one. Acceleration is very useful when stored over time and compared. You can use a timer for that and use states also.
This video on vimeo (archive) shows a particle cloud printing the acceleration graph of another particle cloud. Constant acceleration could be added in the future in the same compound.
local backup: Acceleration.1.1.xsicompound
Acceleration can be used for attributes in the render tree or ICEtree. The acceleration node creates attributes for Acceleration Vector (the direction), Length (the amplitude) and IsAccelerating. IsAccelerating will calculate the state of the current frame in relation to the previous one. Acceleration is very useful when stored over time and compared. You can use a timer for that and use states also.
This video on vimeo (archive) shows a particle cloud printing the acceleration graph of another particle cloud. Constant acceleration could be added in the future in the same compound.
local backup: Acceleration.1.1.xsicompound
author link: http://thiagocosta.net
Generate 3D Particle Grid - Indice Based osAll ICE particle
Improved 3D Grid compound shipped with XSI by generating the point positions based
on the indices of the Grid/Compound specific array, instead of the point ID.
What happens when you use two or more 3D Grid compounds inside the same point cloud is that the point positions start shifting around and you have no precise control over them. With this compound you have exact control over the size, center and more, per compound.
local backup: 3D Particle Grid Indice Based.xsicompound readme.txt
What happens when you use two or more 3D Grid compounds inside the same point cloud is that the point positions start shifting around and you have no precise control over them. With this compound you have exact control over the size, center and more, per compound.
local backup: 3D Particle Grid Indice Based.xsicompound readme.txt
author link: n/a
Push Deform With Weight And Texture Map Input osAll ICE deformer
This deformer does the same thing as the standard push deformer in XSI, except that
it has a texture map input besides the weight map, so it can be used for displacement
map preview. When a color map is used, middle gray (0.5) is 0 deformation, black is
-1 and white is 1, so it's good for using ZBrush disp maps. Tried it with an object
of almost 3 million triangles and it works nicely.
local backup: Push_inICE.xsicompound readme.txt
local backup: Push_inICE.xsicompound readme.txt
author link: n/a
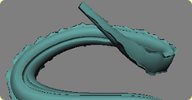 Dual Curve Deform osAll ICE deformer
 First curve defines the path that your mesh conforms to. Second curve is used to set
local banking angle of the mesh, so that »up« direction always points
at the closest point on the curve. Longitude of the mesh is assumed to be along positive
local x-axis.
local backup: Simple Dual path deform.xsicompound readme-dualpath.txt
local backup: Simple Dual path deform.xsicompound readme-dualpath.txt
author on vimeo
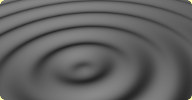 Ripple Deform osAll ICE deformer fluids
 It's an animated ripple compound. if you find any bug please tell me I'll try to fix.
local backup: Simple Ripple.1.2.xsicompound readme.txt
local backup: Simple Ripple.1.2.xsicompound readme.txt
author link: n/a
Simple Envelope osAll ICE deformer
WIP - Simple Envelope built out from ICE Nodes.
local backup: Simple Envelope.xsicompound readme-env.txt
local backup: Simple Envelope.xsicompound readme-env.txt
author link: n/a
Constrain Transform To Curves osAll ICE curves
As seen in Phil's ICE introduction videos.
local backup: Constrain Transform to Curves.xsicompound readme-crv.txt
local backup: Constrain Transform to Curves.xsicompound readme-crv.txt
author link: n/a
Constrain Transform To Surface osAll ICE
As seen in Phil's ICE introduction videos. Constrain object orientation to a floor
plane. Another version by Megantic is available here
local backup: Constrain Transform to Surface.xsicompound readme-srf.txt
local backup: Constrain Transform to Surface.xsicompound readme-srf.txt
author link: n/a
 Phil's ICE Pack osAll compilation deformer ICE particle strands hair scene
 Essential collection of 100 ICE Compounds for various purposes including Hair, Verlet
Dynamics Simulation and DualQ Skinning. By tech ninja Phil Taylor, contains:
 Phil's ICE Pack is included in current releases of Softimage
Array Compounds
Build Array from Per Point Data, Build Index Array, Build Linearly Interpolated Array, Find Closest in Array, Get Array Maximum 2, Get Array Minimum 2, Move in Array, Rebuild Array, Reverse Array, Select SubArray in Array, Build 2D Array, Calc Sub Array Size, Get 2D Array Size, Get 2D SubArray Size, Initialize 2d Array, Pop SubArray from 2D Array, Push SubArray on 2D Array, Resize Array in 2D Array, Select Array in 2D Array, Select SubArray in 2D Array, Set SubArray in 2D Array,
Curve Compounds
Bezier4, Bezier5, Curve Distance to Curve Location, Curve Location to Curve Distance, Curve Location to Normalized U, Fitted Bezier Curve, Normalized U to Curve Location
Debugging Compounds
Build Arrow, Build Capsule, Build Circle, Build Cross, Build Debug Grid, Build Rectangle, Build Sphere, Build Square, Display Arrow, Display Line, Display Point,
local backup: Phils_ICE_Pack.zip
Phil's ICE Pack is included in current releases of Softimage
Array Compounds
Build Array from Per Point Data, Build Index Array, Build Linearly Interpolated Array, Find Closest in Array, Get Array Maximum 2, Get Array Minimum 2, Move in Array, Rebuild Array, Reverse Array, Select SubArray in Array, Build 2D Array, Calc Sub Array Size, Get 2D Array Size, Get 2D SubArray Size, Initialize 2d Array, Pop SubArray from 2D Array, Push SubArray on 2D Array, Resize Array in 2D Array, Select Array in 2D Array, Select SubArray in 2D Array, Set SubArray in 2D Array,
Curve Compounds
Bezier4, Bezier5, Curve Distance to Curve Location, Curve Location to Curve Distance, Curve Location to Normalized U, Fitted Bezier Curve, Normalized U to Curve Location
Debugging Compounds
Build Arrow, Build Capsule, Build Circle, Build Cross, Build Debug Grid, Build Rectangle, Build Sphere, Build Square, Display Arrow, Display Line, Display Point,
show more...
local backup: Phils_ICE_Pack.zip
author site: n/a
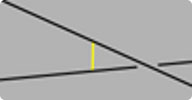 Shortest segment between 2 lines osAll ICE
 Basic math compound to calculate the shortest possible segment between 2 arbitrary
lines.
local backup: Shortest segment between 2 lines.xsicompound readme.txt
local backup: Shortest segment between 2 lines.xsicompound readme.txt