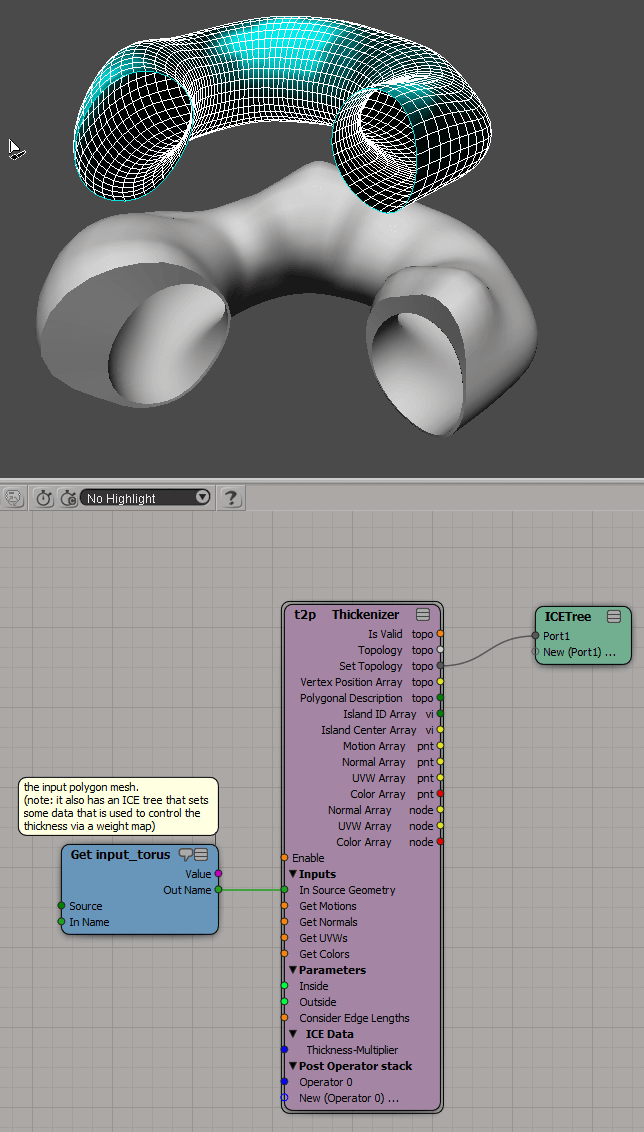
There's a demo scene included in the emTopolizer scene examples folder called
Thickenizer_Torus2 and this shows the basic workflow. I've uploaded the scene here -
https://d.pr/f/8kHQiq.rar -.
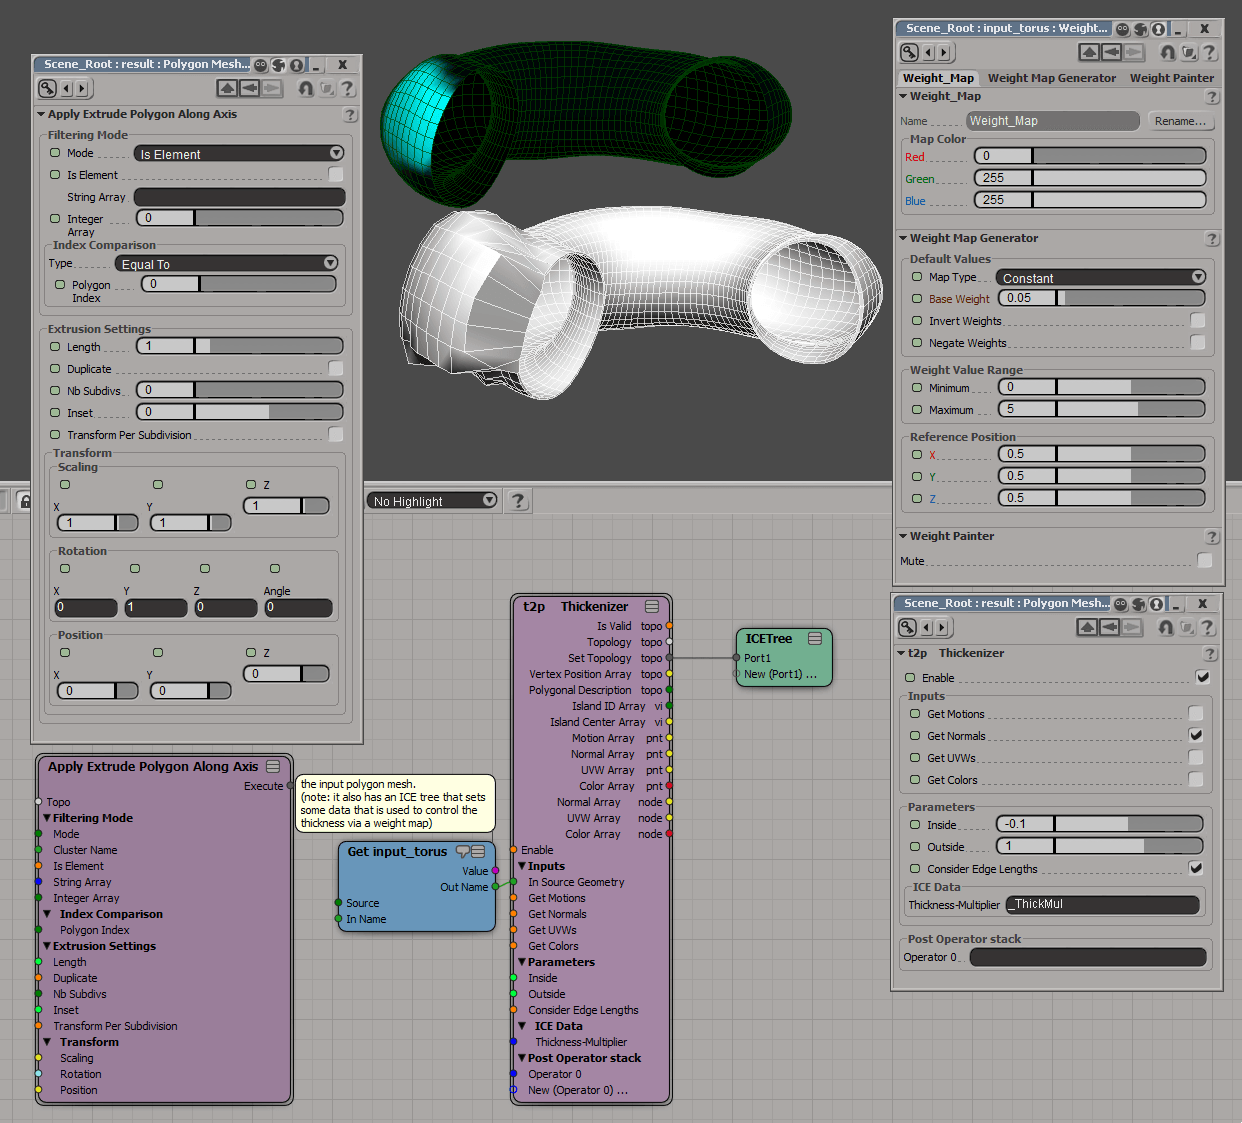
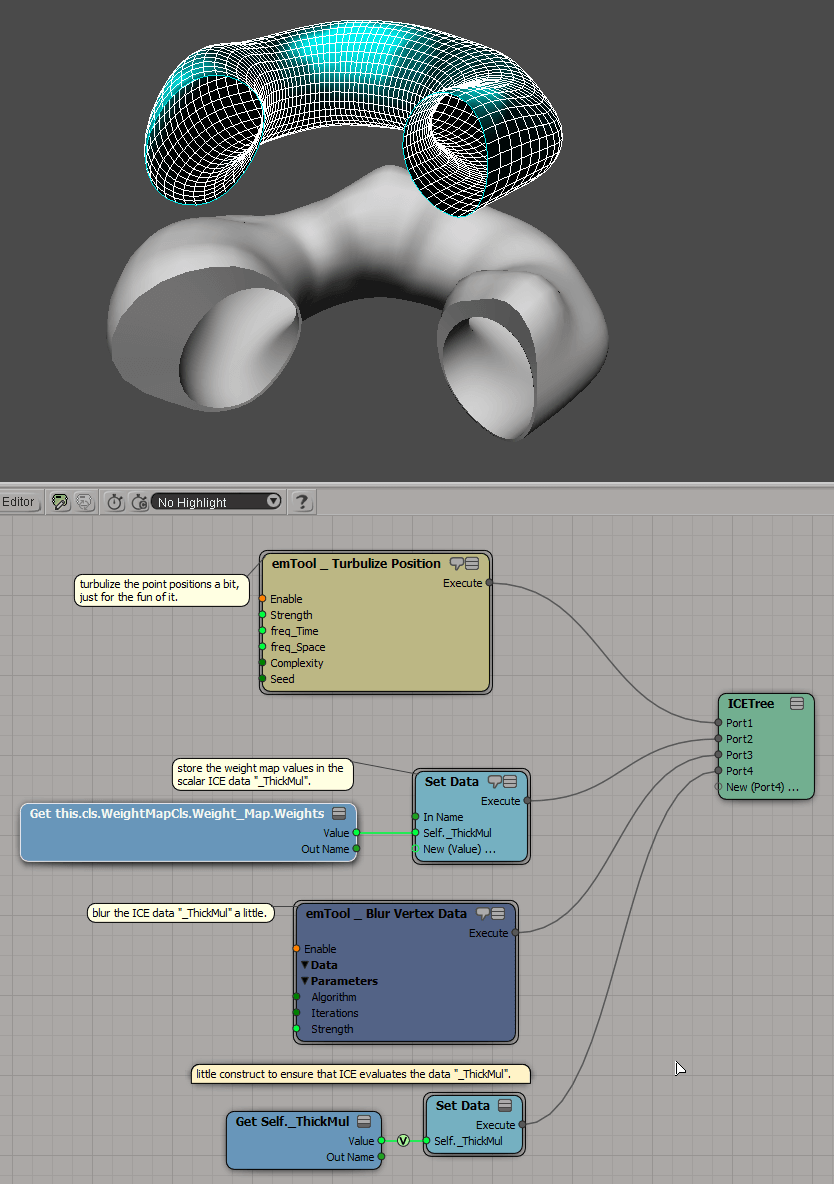
In the screenshot below I've adapted the demo scene to not use laplacian smoothing and have locked a couple of PPG's that contain essential info for making the effect work for what you're attempting (I've also created a weightmap targeting a single section of polygons to better mirror your objective).
I have a preference for the Thickenizer workflow as it provides more control and flexibility but you could also use the native operator - Apply Extrude Polygon Along Axis, using it's
Is Element mode to target the weightmap. With either approach you need to ensure you set up your weightmap with a low base weight above zero (in my case I used 0.05), as this helps ensure you don't get any post extrusion artefacts. This means that you're effectively creating a shell from your geo (all polys get a micro extrusion, as well as your full weight target polygons). And this is another reason for my preference for Thickenizer, as it allows you create separate inner and outer extrusion values. And as you can see in the Thickenizer PPG it also provides inputs and outputs for UV and Color (as well as motion vectors), which helps with your overall ICE tree composition.
The most important aspect of this workflow is that you create your custom ICE attribute (in the demo scene example '
_ThickMul' on duplicate geometry (which you later hide). And then apply the extrusion on your target geo. Hope this clarifies things a little more.