





































Human Head Experiment
-
Hirazi Blue

- Administrator
- Posts: 5113
- Joined: 04 Jun 2009, 10:15
Re: Human Head Experiment
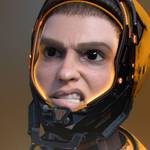
Somehow the tweaking you've done has "magically" turned your head model into something definitively feminine IMHO, so well done & happy UVing!!!
Stay safe, sane & healthy!
-
shushens

- Posts: 192
- Joined: 13 Jun 2009, 05:34
- Skype: shushens
- Location: Paderborn, Germany
Re: Human Head Experiment
Hahaha, thanks a lot, man. Really appreciate your feedback.
I was just pushing and pulling verts for over an hours... God knows that happened... If you ask me do it again, I would have no clue where to begin LOL.
But thank God my scene file is quite intact. I even took a backup LOOL.
I was just pushing and pulling verts for over an hours... God knows that happened... If you ask me do it again, I would have no clue where to begin LOL.
But thank God my scene file is quite intact. I even took a backup LOOL.
You do not have the required permissions to view the files attached to this post.
My ill-maintained blog: http://visualdeceptions.info/blogger
-
craft
- Posts: 107
- Joined: 02 Jan 2010, 23:40
- Location: Portugal
Re: Human Head Experiment
 congratulations Shushens. i coun't agree less with Hirazi.
Tiago Beijoco
http://www.craft.host56.com
http://www.craft.host56.com
-
Hirazi Blue
- Administrator
- Posts: 5113
- Joined: 04 Jun 2009, 10:15
Re: Human Head Experiment
I don't mind either way, but we agree on liking it, don't we?craft wrote:i coun't agree less with Hirazi.

Stay safe, sane & healthy!
-
rray

- Moderator
- Posts: 1810
- Joined: 26 Sep 2009, 13:51
- Location: Bonn, Germany
Re: Human Head Experiment
Great results especially considering this is your fourth head ever 
Details look perfect, but there seems to be something off with the proportions.
If you still like, try this:
Replace the isometric front/side views with actual perspective cameras that view the model from front/side, at a realisitic distance
(I would say at a distance 5-10 times the size of the head)
Then tweak to match the reference again.
This should improve the proportions because the photos were not taken with an isometric cam either, so there should be a better match with the real head
(don't know if something like a isometric camera exists at all )
)
Details look perfect, but there seems to be something off with the proportions.
If you still like, try this:
Replace the isometric front/side views with actual perspective cameras that view the model from front/side, at a realisitic distance
(I would say at a distance 5-10 times the size of the head)
Then tweak to match the reference again.
This should improve the proportions because the photos were not taken with an isometric cam either, so there should be a better match with the real head
(don't know if something like a isometric camera exists at all
)softimage resources section updated Sep 26th 2026
-
craft
- Posts: 107
- Joined: 02 Jan 2010, 23:40
- Location: Portugal
Re: Human Head Experiment
hahah sorry, my bad. i meant i couldn't agree MORE!Hirazi Blue wrote:I don't mind either way, but we agree on liking it, don't we?craft wrote:i coun't agree less with Hirazi.

Tiago Beijoco
http://www.craft.host56.com
http://www.craft.host56.com
-
Hirazi Blue
- Administrator
- Posts: 5113
- Joined: 04 Jun 2009, 10:15

-
shushens
- Posts: 192
- Joined: 13 Jun 2009, 05:34
- Skype: shushens
- Location: Paderborn, Germany
Re: Human Head Experiment
You do not have the required permissions to view the files attached to this post.
My ill-maintained blog: http://visualdeceptions.info/blogger
-
Hirazi Blue
- Administrator
- Posts: 5113
- Joined: 04 Jun 2009, 10:15

-
shushens
- Posts: 192
- Joined: 13 Jun 2009, 05:34
- Skype: shushens
- Location: Paderborn, Germany
Re: Human Head Experiment
Unfold is not giving very good results. So I just used Modo's unwrap and adaptive UV relax in symmetry mode.
How does it look? In most parts, not much stretching. Some in the lip area, but that's inevitable, no?
How does it look? In most parts, not much stretching. Some in the lip area, but that's inevitable, no?
You do not have the required permissions to view the files attached to this post.
My ill-maintained blog: http://visualdeceptions.info/blogger
-
Hirazi Blue
- Administrator
- Posts: 5113
- Joined: 04 Jun 2009, 10:15
Re: Human Head Experiment
Well, UV Layouts are most definitively NOT my thing (but, come to think of it, what is?  ), so I cannot really comment on the result. Eagerly await the texture painting stage (when there's always plenty to nag about... )
), so I cannot really comment on the result. Eagerly await the texture painting stage (when there's always plenty to nag about... )Stay safe, sane & healthy!
-
craft
- Posts: 107
- Joined: 02 Jan 2010, 23:40
- Location: Portugal
Re: Human Head Experiment
yo.
yes, not bad i would say ;) maybe you could use this tool in modo -what's it's name- to distort the main uv, so that the neck area is smaller than the face. looking at the shaded pic i can see the neck gets a larger texture space per area than the face and it should be the opposite. it's nothing serious really, so you can just leave it like that. Just trying to be constructive ;)
And here's also a tip to see what is REALLY going on with your uv's: see that squared texture you used? take it to photoshop and overlay a high frequency noise layer to it... so that your picture looks grainy. this way when you apply the image to your model you can both see how well it's being mapped both in a larger scale and at a very small scale aswell. It's a good way to avoid bumping into some crazy pinching latter on.
yes, not bad i would say ;) maybe you could use this tool in modo -what's it's name- to distort the main uv, so that the neck area is smaller than the face. looking at the shaded pic i can see the neck gets a larger texture space per area than the face and it should be the opposite. it's nothing serious really, so you can just leave it like that. Just trying to be constructive ;)
And here's also a tip to see what is REALLY going on with your uv's: see that squared texture you used? take it to photoshop and overlay a high frequency noise layer to it... so that your picture looks grainy. this way when you apply the image to your model you can both see how well it's being mapped both in a larger scale and at a very small scale aswell. It's a good way to avoid bumping into some crazy pinching latter on.
Tiago Beijoco
http://www.craft.host56.com
http://www.craft.host56.com
-
shushens
- Posts: 192
- Joined: 13 Jun 2009, 05:34
- Skype: shushens
- Location: Paderborn, Germany
Re: Human Head Experiment
Sorry for the delay. I was out of town for a couple days.
I apologize for posting screenshots that have nothing to do with XSI. But I thought, since texture painting is not an XSI feature anyway, so it would not be an issue.
I apologize for posting screenshots that have nothing to do with XSI. But I thought, since texture painting is not an XSI feature anyway, so it would not be an issue.
You do not have the required permissions to view the files attached to this post.
My ill-maintained blog: http://visualdeceptions.info/blogger
-
craft
- Posts: 107
- Joined: 02 Jan 2010, 23:40
- Location: Portugal
Re: Human Head Experiment
.. well, at least you didn´t say zbrush. i would report you for that hehehe.
did you sort that sss problem you were facing?
did you sort that sss problem you were facing?
Tiago Beijoco
http://www.craft.host56.com
http://www.craft.host56.com
-
agrmrs
Re: Human Head Experiment
hi shushens,very nice head modeling ......i'm a xsi begginer  can u tell me which primitive u used to begin the head ?......did u use poly by poly method ? and how do u do it symmetrically ? thanx
can u tell me which primitive u used to begin the head ?......did u use poly by poly method ? and how do u do it symmetrically ? thanx -
shushens
- Posts: 192
- Joined: 13 Jun 2009, 05:34
- Skype: shushens
- Location: Paderborn, Germany
Re: Human Head Experiment
Hehehe I can't handle ZBrush very well, Tiago. Besides, I am not a fan of per-poly painting.
Any comments on the texture? Does it look okay? Should I leave it there and try to do shading? I do not have any idea how to do skin shading, actually
I am thinking of giving that BA shader a shot. How should I go about it? Do epidermal, subdermal, back, Fresnel and specular in different passes and then composite them?
Isolating back scattering, specular and Fresnel seems simple. But how do I put epidermal and subdermal back together?
That other SSS problems hasn't been fully solved yet. But I'm working on it
@agrmrs, I began from the lips, as you can see. I have done that a few times before. Either I take a cube and start cutting it up to give it the shape of the upper lip, or I create a simple quad using the Create Polygon Tool (shortcut: N) and then keep extruding edges endlessly until the whole head is done.
If you are doing box modelling, then delete one half of the box, clone the other half, and scale it to -1 on X axis while pivot is on the Y axis.
If you are working with Create Polygon Tool and edge extrude, then create at least one polygon, then make a model out of it. Select the model's null, create instance, scale it to -1 with pivot on the Y axis, and finally under the visibility options of the instanced model, uncheck selectability. Now keep extruding from that polygon and create polygons with existing geometry selected and everything will keep getting copied to the other side. Very useful workflow if you ask me.
But I did not use any of it here. I just went on modelling half of it. Before taking screenshots, I selected all polygons and ran 'Symmetrize Polygons'.
Hope it helps, mate
Any comments on the texture? Does it look okay? Should I leave it there and try to do shading? I do not have any idea how to do skin shading, actually
I am thinking of giving that BA shader a shot. How should I go about it? Do epidermal, subdermal, back, Fresnel and specular in different passes and then composite them?
Isolating back scattering, specular and Fresnel seems simple. But how do I put epidermal and subdermal back together?
That other SSS problems hasn't been fully solved yet. But I'm working on it
@agrmrs, I began from the lips, as you can see. I have done that a few times before. Either I take a cube and start cutting it up to give it the shape of the upper lip, or I create a simple quad using the Create Polygon Tool (shortcut: N) and then keep extruding edges endlessly until the whole head is done.
If you are doing box modelling, then delete one half of the box, clone the other half, and scale it to -1 on X axis while pivot is on the Y axis.
If you are working with Create Polygon Tool and edge extrude, then create at least one polygon, then make a model out of it. Select the model's null, create instance, scale it to -1 with pivot on the Y axis, and finally under the visibility options of the instanced model, uncheck selectability. Now keep extruding from that polygon and create polygons with existing geometry selected and everything will keep getting copied to the other side. Very useful workflow if you ask me.
But I did not use any of it here. I just went on modelling half of it. Before taking screenshots, I selected all polygons and ran 'Symmetrize Polygons'.
Hope it helps, mate
My ill-maintained blog: http://visualdeceptions.info/blogger