TMNT Complete Episode Work/Image Thread

Comments on work in progress
User avatar
FXDude
Posts: 1145
Joined: 19 Jun 2012, 19:59

Re: TMNT Complete Episode Work/Image Thread

Post by FXDude » 27 Nov 2014, 23:14

Perhaps something along those lines (?)

(rough but to give an idea)

Image

If you want, I also included the 'glow' image that you can put on a grid constrained in direction to the cam in front of the candles
(I suggest 1 big over all of them, and 1 small over each flame)
You do not have the required permissions to view the files attached to this post.

User avatar
Shredder565
Posts: 1107
Joined: 02 Jan 2012, 19:04

Re: TMNT Complete Episode Work/Image Thread

Post by Shredder565 » 28 Nov 2014, 01:24

damn, that really IS what I was trying to go for...Ill have to take a look at it in more detail in the morning.

User avatar
Shredder565
Posts: 1107
Joined: 02 Jan 2012, 19:04

Re: TMNT Complete Episode Work/Image Thread

Post by Shredder565 » 28 Nov 2014, 18:14

And if I can get th e candle to look like you made it look, I'll re render every scene it's in if Ihave to get it to look better :)

final fixups for act one. replacing turtle models with newer ones in some shots, reworking entire backgrounds and animation in others..
Image

Image


Just spent three hours cleaning up april some more. all her hatched verticies are gone. all cubes.. and dead lines are removed. points to nowhere gone. straightened lines up. EVERYTHING about her is a final except the damn nose, eyes and mouth placement.

Image


Image

Image

User avatar
Shredder565
Posts: 1107
Joined: 02 Jan 2012, 19:04

Re: TMNT Complete Episode Work/Image Thread

Post by Shredder565 » 29 Nov 2014, 00:36

Image

well, that didn't work.... it only looks slightly more transparent. must have done something wrong

User avatar
Hirazi Blue
Administrator
Posts: 5113
Joined: 04 Jun 2009, 10:15

Re: TMNT Complete Episode Work/Image Thread

Post by Hirazi Blue » 29 Nov 2014, 15:56

The second April in the second to last post still suffers from "too much" shading IMHO. And she obviously still could use a "nose job", but I have a feeling a more flat shading could help hide these inconsistencies a bit better. (But that's indeed nothing more than a feeling, I hasten to add).
;)
Stay safe, sane & healthy!

User avatar
Shredder565
Posts: 1107
Joined: 02 Jan 2012, 19:04

Re: TMNT Complete Episode Work/Image Thread

Post by Shredder565 » 29 Nov 2014, 22:20

yeah..the constant suggested earlier made it look a little better, but a little too flat I thought. the phong, however, makes it look too weird. I still have yet to look at that shading tutorial..

Image

Image
Image
Image
Image
Image
Image
Image
Image
Image

i'm hoping these new lighting attempts will not only look better, but not give people seizures like the last ones might have done :)

User avatar
FXDude
Posts: 1145
Joined: 19 Jun 2012, 19:59

Re: TMNT Complete Episode Work/Image Thread

Post by FXDude » 30 Nov 2014, 00:32

I think April looks pretty good there, not just compared to the shaded ver, but to her previous expressions.

Image

Otherwise, I don't know where the very bright contrasty yellow highlights come from or what you're going for there
but they seem to be way too much.. in bot saturation and intensity.

Image

This seems less visually agressive, but..
Image

.. but I think if you brought the visual quality at the same level as some of your modeling (like the turtles, the big sphere/drill base model and other things) it would be really cool!

And I think it's just a question of putting as much attention/patience and "getting new skills" as what involved modeling those things, but on a shading/rendering level.

(meaning I know you can ;) )

And you could also further study/scruitize/observe subtleties of the "feel" of references that you like to further refine the overall look.

I think you should concentrate on making a just a few good ones as best you can, like prototypes, and only then apply tweaks more in mass.


Also I included a shot on how to map the glow pic, you can just apply a sprite shader to the grid, create an "XZ" projection from the "image" node, and plug that to the color and alpha of the sprite node.

Cheers!
You do not have the required permissions to view the files attached to this post.
Last edited by FXDude on 30 Nov 2014, 00:39, edited 2 times in total.

User avatar
Shredder565
Posts: 1107
Joined: 02 Jan 2012, 19:04

Re: TMNT Complete Episode Work/Image Thread

Post by Shredder565 » 30 Nov 2014, 00:37

edit - the bright highlights where an attempt to simulate the candle flickering light emition.


once I am done with fixing things up, I intend to take a month long break...and focus more on CG art.

Recreating ONE scene from something not animated, using textures, lighting, effects. all those things I've basically avoided for ten years because they seem so damned complex. I am alot less lenient to learn new things at 36 than I was at 20.
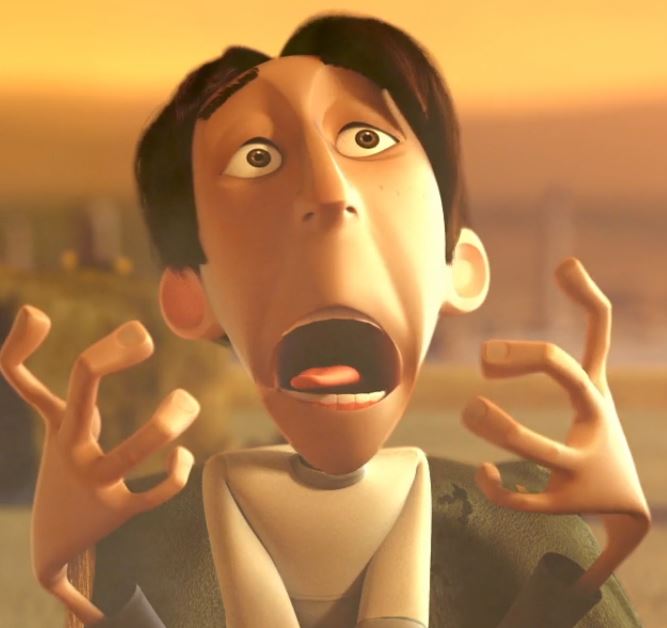
But, this will be the test to try.

I've already loosely started..... 3P0. focus will be on reflection and texturing metal.

Image

User avatar
FXDude
Posts: 1145
Joined: 19 Jun 2012, 19:59

Re: TMNT Complete Episode Work/Image Thread

Post by FXDude » 30 Nov 2014, 01:15

Okay, anxious to see a pic of something you worked-on,
(doesn't at-all need to be perfect or 'great' especially the first shots)

There is also host of tuts up on youtube that can help.

Below is a list pertaining to surfacing & lighting,

from the super extensive list here
https://www.si-community.com/forum/v ... =46&t=1451
uploaded by AceMastermind

It may -seem- complicated (if not scary),
but it's only after going through basic concepts that you will see that it's not complicated at all (!)

(especially that you happen to be using the most human friendly app out there :) )

But without considering that, just the basic toon shading tut previsouly referenced should be enough to bring your Ninja Turtles to a new level :)


Texturing
Materials and Textures
Materials
Texture projections, part 1
Texture projections, part 2
Polygon texturing

Texture and Layer Editor
Texture Editor introduction
Head texturing
Unwrapping UVs, part 1
Unwrapping UVs, part 2
Unwrapping UVs, part 3
Contour stretching UVs

Lighting
Light types
Area lights
Last edited by FXDude on 30 Nov 2014, 01:20, edited 1 time in total.

User avatar
Shredder565
Posts: 1107
Joined: 02 Jan 2012, 19:04

Re: TMNT Complete Episode Work/Image Thread

Post by Shredder565 » 30 Nov 2014, 01:20

right now i'm going throuh that light image, and can't figure out how to make a sprite, if that's even a thing! #dense!

User avatar
FXDude
Posts: 1145
Joined: 19 Jun 2012, 19:59

Re: TMNT Complete Episode Work/Image Thread

Post by FXDude » 30 Nov 2014, 01:36

Select your Grid, apply any material just to have a material, say RENDER-> Material -> Constant

Open the RenderTree
type "sprite" in the search box, (sprite is made to map stuff on grids)

Drag it from the list to the node view,
replace the constant mat by plugging in the sprite material,

drag the glow.png to the tree, it will also create an "image" node
plug the "image" to the "input" and "matte" slots.

Open the "image" property page, and from the "Texture Projection" section, tick "New" and select XZ as a projection, and that should be it.


But we can't micro-help you at every step, you're going to have to do some research, pause and rewind youtube videos, and do some amounts of trial and error, not unlike you've already gone this far with your project. ;)

User avatar
Shredder565
Posts: 1107
Joined: 02 Jan 2012, 19:04

Re: TMNT Complete Episode Work/Image Thread

Post by Shredder565 » 30 Nov 2014, 02:00

Image

true, true..

but hot damn, I can't believe I got it to work..

hence the scary part... my google skills suck :)

User avatar
FXDude
Posts: 1145
Joined: 19 Jun 2012, 19:59

Re: TMNT Complete Episode Work/Image Thread

Post by FXDude » 30 Nov 2014, 02:44

Pfff!.. "can't beleive" ;)

You can have a look at the alpha of the pic if you want to see why it does what it does,
(right-click in the image preview in the 'image' node properties -> display channel -> alpha)

And bear in mind that the grid can't intersect with anything without seeing an edge,
but can be put at any distance between the cam and whatever is glowing,
(and scaled down accordingly if closer to the cam) to easily avoid intersections.

And as previously mentioned, (for the camera constraint) you can parent the grid under a null, offset the grid away from the null, then select the null and do : constrain -> direction, and then pick the camera as a target.

In the constraint property, you'll probably have to try every X Y Z button to see which one makes the grid always face the camera, then you can just position the null over whatever you want to glow, and/or making it a child of say the chandelier since it is moving.

Good luck! (and nice work!)

User avatar
Shredder565
Posts: 1107
Joined: 02 Jan 2012, 19:04

Re: TMNT Complete Episode Work/Image Thread

Post by Shredder565 » 01 Dec 2014, 14:40

the blue is supposed to represent the blue blinking light of the generator flashing. not sure I like these as much.

Image
Image
Image


Image

not only looks smoother, but got a better run cycle out of it.
Image

Image
Image
Image
Image

User avatar
Shredder565
Posts: 1107
Joined: 02 Jan 2012, 19:04

Re: TMNT Complete Episode Work/Image Thread

Post by Shredder565 » 02 Dec 2014, 22:02

Image
Image
Image

Image

thus brings to an end Big Rip Off fixes.....started this in February, finished in december. little under 10 months. not bad.

now comes a month break. If I do Big Break in to finish up the trilogy, it will be next year...and in conjunction with fixing up Big Blow Out..

User avatar
Shredder565
Posts: 1107
Joined: 02 Jan 2012, 19:04

Re: TMNT Complete Episode Work/Image Thread

Post by Shredder565 » 04 Dec 2014, 04:19


being updated right now with final improvments...just have one last thing to fixin the end credits, and this project will be done. at least for all intents and purposes. started in february, finished just now. so ten months, one person. no life to do it :)

I may update the vernon scenes to look nicer, but only if I can get the model working with improvements.