Back to real bussines....

So... raygun, as an essential

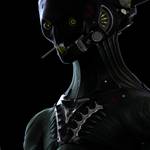
part of such imaging. I think it's interesting how this one evolved through years. First design belongs to MoI (MoI is only NURBs modeler, no polygons there) as a part of re-building the
Nurbs skills. While MoI imho offers one of the best ergonomy on planet, drawback for such work is modeling style similar to Rhino concepts from 90s. Everything is around somehow deformed Nurbs single patch (loft, revolve, so on), and trimming and blending over that. Has no built in system of smooth stitching, like t-spline. That makes it great for adding the small details, cuts, but unacceptable hard for building the blob style, long transitions between volumes. Also, every hard cut has to be beveled manually. Finally, DCC apps, all except Maya, are not good when importing these trims over trims, blends and such. To be fair , MoI has great mesher, but then I'll have to deal with huge meshes, custom normals and whatever.
Next one is kind of retopology in SI, now only by polygons, suitable for subds.
And last one for now, is re - design in Maya. Nothing that can't be done in SI, but my SI is 8 years old XSI 7.01, perhaps there's time for change. Found these 'wings' unpractical, wanted entire thing a bit more smoother. Basically modeled it in same way as in SI. There's always what I calling an 'etalon', base main surface having no details. Rest is snapping to etalon, Shrink Wrap in SI or Maya Live or Maya Shrink Wrap. After some adaptation, found 'Maya way' a bit more handy. Good old Maya Live is a kind of snap, not an operator, it's a bit easier to turn it off / on. Tip: setting the Transform Constraint in Tool Settings to 'Closest Point', allows Maya live to nicely snap to target boundaries. Another Tip: double click on tool icon (move tool or else), opens the Maya Tool Settings window.
And few more tips.. If you don't like Maya radial Marking Menus that much, good news is, it's possible to avoid them to some level. So, for getting the Maya Marking menu to behave in a way ike in pic, procedure is:
- find appropriate MELs in scripts/others and scripts/startup. List in pic, are MELs responsible *only* for poly modeling, component selections and transform constraints (what you getting by holding WER keys, once certain transform tool is active)
- *copy* them to user/prefs/scripts folder. This makes them 'preference' scripts, Maya will load them instead of factory ones. Also, this makes it easy to go back to defaults if needed, just remove them for user/prefs/scripts folder.
- comment out, or delete something like -radialPosition "N", or -rp "W" ("N" or "W" means north or west, so could be something else). This tells to Maya, to just collapse the radial menu into list.
- do it in Maya Script Editor, at very own risk of explosion, Maya wildly running around room, anything. In case of new version or update, it's possible you'll need to do it again.

Selections, components....
In SI, we have a magic TUI keys for component selections. For decade, I've used only these three plus another custom three for converting the component selection. In Maya, that's more 'granular'
process. So, to get something similar, I'm using custom sequences. It's really easy and handy to create them in Hotkey editor, just go to Runtime Command Editor and create them. Maya admirably loads them once they are saved. This is equivalent of T key in SI:
Code: Select all
selectPref -useDepth false;
selectPref -paintSelect 0;
strsTweakMode(0);
setToolTo selectSuperContext;
selectMode -component;
setComponentPickMask "Point" true;
setComponentPickMask "Line" false;
setComponentPickMask "Facet" false;
setComponentPickMask "ParmPoint" false;
selectMode -component;
It's a bit long list, but I think it contains the all possible combinations for 'safe' switching, in case you have appropriate scripts for polygons or edges. Consequently, permanent tweak component mode is something like this:
Code: Select all
setToolTo moveSuperContext;
selectMode -component;
strsTweakMode true;
strsTweakModeDoIt(1);
selectPref -useDepth false;
setComponentPickMask "Point" true;
setComponentPickMask "Line" false;
setComponentPickMask "Facet" false;
setComponentPickMask "ParmPoint" false;
manipMoveContext -e -ah 3 Move;
Not sure is at all needed. By default, tweak Mode in Maya is holding the tilde key. Great part of this, is easy switch from manipulator to tweak, there's great possibility to tweak the SRT, too. Not so great part become with snapping, one has to hold tilde *and* snapping key (that's great if you're octopus, anyway). One special moment is 'inheritance' of move tool if moving along one axis, tweak mode will stay in that axis. " manipMoveContext -e -ah 3 Move; " at end is just to prevent this 'inheritance', setting the move context back to all three axes.
Last tip: there are ( at least ) two types of "component modes" in Maya. One is 'true', what you'll get by F8 or scripts like these. Another is kind of mixed mode, object + component (title bar shows nicely that is primarily object mode), this one is called by main object marking menu, and many other commands. From my understanding, purpose is to allow setup of things like partial shrink wrap (some points wrapped to certain object). But, it's also confusing for users of "cleaner" interaction like SI. To get out of that, object + component mode , user has to press F8 toggle twice, or, with scripts like these: first to go into component mode, then into object mode.





































 issues with window flying around