groomtools - hair layering compounds
Posted: 08 Feb 2016, 20:53
Here's 2 new compounds "hair layer" and "hair emit" that do ICE strand interpolation from guide curves
Use as follows:
* Install ICE array nodes (won't work without)
* Create emitter poly mesh (shouldn't be closed geo, for example use top half of a sphere)
* Create UVs using property->Texture Projection->Unfold
* Paint a weightmap on the emitter, with higher values where the hair is to become more dense (this step is optional)
* Duplicate the emitter mesh, create an ICE tree on it and plug in the "Morph to UV" compound, rename it to *_uv_helper or similar
* Create an empty point cloud, add a new ICETree and plug in the Hair Emit compound, plug the emitter mesh into this node
* Make the point cloud and the other mesh unselectable - this will help with the curve styling later
* Now you could add all following nodes to one ICE tree, but performance will be better when you separate the emit and the layer compounds to different ICE trees
* Create a new ICE tree on the point cloud and add a Hair Layer compound
* Plug the two meshes into that one, and a Get Data of a group with guide curves. Guide curves can be added dynamically by duplicating after that.
* Add more Layer or more Emit compounds (adding another Emit will make all existing strands guides - use this for clumps)
* You can modify layer parameters with factory compounds such as modulate by null
* You can add additional effects using factory nodes such as curl, plugged into "other effects" port. This is different than adding it as a new tree because it will use the layer blending
Some examples:
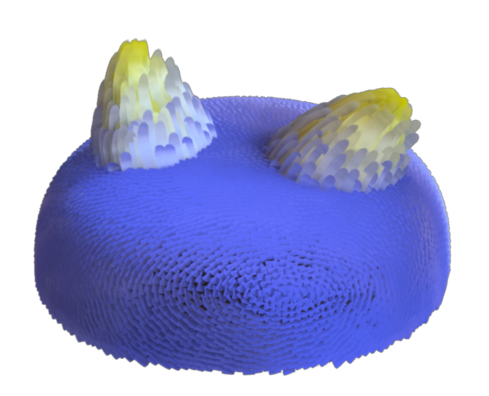
Example 1-- this was done with a hair layer compound creating blue strands and another layer compound on top that creates yellow strands, either using 2 guides.
Blending was done by distance to guide curve (blue using a much bigger distance than yellow so it fills the whole object)
Example 2 -- this uses "modulate by null" to blend the layers.
The first two layers (modulate by box shaped null) separating left and right (scatter blend)
The third (modulate by sphere shaped null) separating front and back (using regular blend)
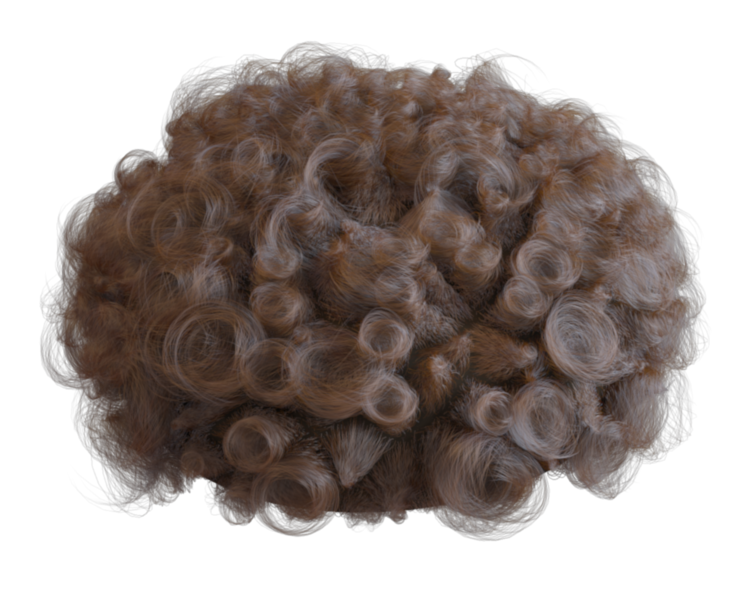
Example 3 - This uses a second emit compound. When a second emit compound is used, it will use all strands created by the first as guides. No additional guides have to be plugged into the next layer compound.
It also uses the factory "curl strands" compound to add a curl to the strands. Curl size random ID is controlled by the ICE attribute ClosestGuideID, so all strands belonging to one guide will have the same random value. Dissect the sample scene for more details.
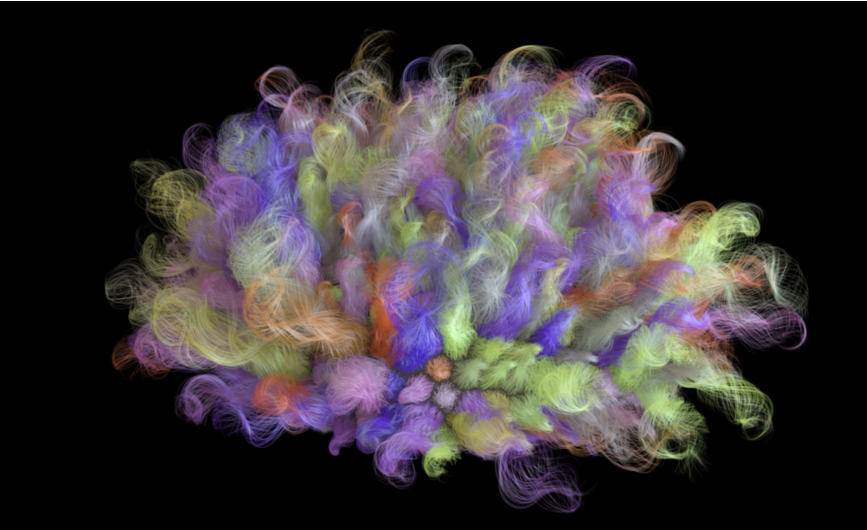
Example 4 - When no "override color" is used for the strands, it interpolates the guide's colors

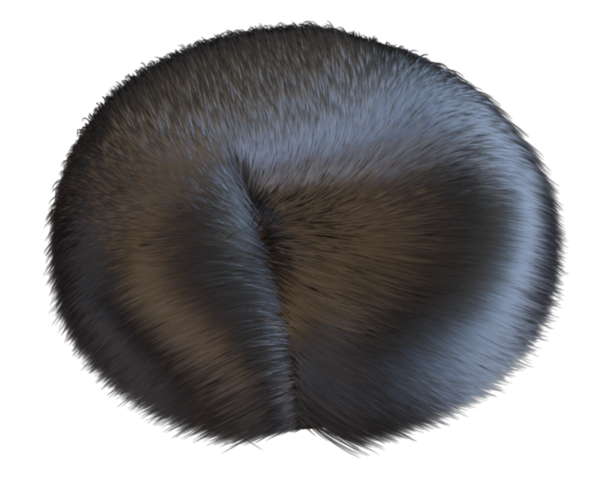
Example 5 - fur
http://si-community.com/download/lb/rra ... scenes.zip
http://si-community.com/download/lb/rra ... ls_2.0.zip
(converted from attachments to downloads to save forum space)
Use as follows:
* Install ICE array nodes (won't work without)
* Create emitter poly mesh (shouldn't be closed geo, for example use top half of a sphere)
* Create UVs using property->Texture Projection->Unfold
* Paint a weightmap on the emitter, with higher values where the hair is to become more dense (this step is optional)
* Duplicate the emitter mesh, create an ICE tree on it and plug in the "Morph to UV" compound, rename it to *_uv_helper or similar
* Create an empty point cloud, add a new ICETree and plug in the Hair Emit compound, plug the emitter mesh into this node
* Make the point cloud and the other mesh unselectable - this will help with the curve styling later
* Now you could add all following nodes to one ICE tree, but performance will be better when you separate the emit and the layer compounds to different ICE trees
* Create a new ICE tree on the point cloud and add a Hair Layer compound
* Plug the two meshes into that one, and a Get Data of a group with guide curves. Guide curves can be added dynamically by duplicating after that.
* Add more Layer or more Emit compounds (adding another Emit will make all existing strands guides - use this for clumps)
* You can modify layer parameters with factory compounds such as modulate by null
* You can add additional effects using factory nodes such as curl, plugged into "other effects" port. This is different than adding it as a new tree because it will use the layer blending
Some examples:
Example 1-- this was done with a hair layer compound creating blue strands and another layer compound on top that creates yellow strands, either using 2 guides.
Blending was done by distance to guide curve (blue using a much bigger distance than yellow so it fills the whole object)
Example 2 -- this uses "modulate by null" to blend the layers.
The first two layers (modulate by box shaped null) separating left and right (scatter blend)
The third (modulate by sphere shaped null) separating front and back (using regular blend)
Example 3 - This uses a second emit compound. When a second emit compound is used, it will use all strands created by the first as guides. No additional guides have to be plugged into the next layer compound.
It also uses the factory "curl strands" compound to add a curl to the strands. Curl size random ID is controlled by the ICE attribute ClosestGuideID, so all strands belonging to one guide will have the same random value. Dissect the sample scene for more details.
Example 4 - When no "override color" is used for the strands, it interpolates the guide's colors
Example 5 - fur
http://si-community.com/download/lb/rra ... scenes.zip
http://si-community.com/download/lb/rra ... ls_2.0.zip
(converted from attachments to downloads to save forum space)