


Kristinka C

Re: Kristinka C
appreciated! (BTW, the previous versions have always worked flawlessly on my 7.0.1 vista 64/ now win7 64. This after reading all the posts regarding problems.)

Re: Kristinka C
Thank you guys
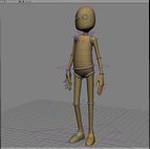
So what new we have here, is a fur 'vector field'.
Basically, fur takes it's orientation from emitters UVs, but direction is modified by rig of nulls. That gives a much smoother interpolation than taking the whole orientation directly from surface, also it helps in avoiding visible UV seams.
As you can notice, UVs that I've used is just an "ordinary" UV layout. Fur shape is modeled by ICE compound, something similar to factory strands compounds. Here I've used only one shape, but it is possible to combine many of them.

It's a single point cloud with single ICE tree - and just another one that creates necessary attributes on emitter.

Next time, I hope I'll show fur dynamics. It really isn't ground breaking, but it should be very simple for use.
Cheers
And of course, here is draft render - for hair, I've used existing "Follow Nurbs" modifier (yes I wrote tutorial for that )
)
So what new we have here, is a fur 'vector field'.
Basically, fur takes it's orientation from emitters UVs, but direction is modified by rig of nulls. That gives a much smoother interpolation than taking the whole orientation directly from surface, also it helps in avoiding visible UV seams.
As you can notice, UVs that I've used is just an "ordinary" UV layout. Fur shape is modeled by ICE compound, something similar to factory strands compounds. Here I've used only one shape, but it is possible to combine many of them.
It's a single point cloud with single ICE tree - and just another one that creates necessary attributes on emitter.
Next time, I hope I'll show fur dynamics. It really isn't ground breaking, but it should be very simple for use.
Cheers
And of course, here is draft render - for hair, I've used existing "Follow Nurbs" modifier (yes I wrote tutorial for that
Re: Kristinka C
Hi all,
I've updated "Follow NURBS" styling tutorial for new version of compounds.
Tutorial online is here.
Download, together with support files, is here.
Cheers
...and that's a 'one point' dynamics. Actually, strands just follows the point simulation. I'll work more on this one.
[flv]http://www.matkovic.com/anto/kh-fur-one ... 9dec30.flv[/flv]
Cheers again, and Happy New Year!

Re: Kristinka C
Awsome. Looking forward to the release  !
!
Happy new year!
Happy new year!
softimage resources section updated Jan 5th 2024
-
wailingmonkey
- Posts: 14
- Joined: 21 Aug 2009, 07:49
Re: Kristinka C
many thanks for this, Mathaeus...your effort in documenting this is greatly appreciated! 
Re: Kristinka C
Hi all,
It's there. Almost all mentioned features are present, including a few of new generators/modifiers: the one that interpolates strands between two NURBS surfaces, also special 'Bend' modifier. "Bend" is my personal favorite, I hardly prevented myself from adding this one in every sample. What isn't there, it's interpolation of hair point cloud over 'Generate strand trails' factory compound - that will need a bit more work to make it stable.
So how it works:
First step is, always, polygon mesh with texture projection. There is no need for tangent map. Second is compound that generates point cloud, strands and basic attributes, here it's called 'Strand Sample Set' or 'Strand Grid'.
Then, there are three kind of compounds for generating strand's profile: Bezier curves between NURBS surfaces, that's called 'Cross Sections'. Strand positions derived from NURBS surfaces or curves, that's called 'Follow'. And, procedurally generated strand profiles, that is 'Fur'. All three can be used in the same point cloud, if that makes sense.
On top of that, deformation compounds: curls, bend, turbulence, randomize, grouping...
At the end of the day, second, optional point cloud that fills the strands over the first one, but it also can carry deformations.
Under the hood, it's endless variation of famous 'Fill interpolated array' - or - 'Build linearly interpolated array' compound, creativity with geometry queries, something from Phil Pack, something from MT Strands....
... so, for more specific ICE tutorials, I would go to already written stuff, like MT Strand samples, Thiago's tutorials, so on.
Also, just common tutorials for every 3d software, about NURBS modeling, very simple math such as add, subtract, modulo, lerp, divide, multiply.... , basic rigging stuff, up vectors, direction constraints...
All stuff is created with XSI 7.01, using factory nodes, so it should work nicely with all versions above 7.01.
Download compounds and samples, here.
Cheers
It's there. Almost all mentioned features are present, including a few of new generators/modifiers: the one that interpolates strands between two NURBS surfaces, also special 'Bend' modifier. "Bend" is my personal favorite, I hardly prevented myself from adding this one in every sample
So how it works:
First step is, always, polygon mesh with texture projection. There is no need for tangent map. Second is compound that generates point cloud, strands and basic attributes, here it's called 'Strand Sample Set' or 'Strand Grid'.
Then, there are three kind of compounds for generating strand's profile: Bezier curves between NURBS surfaces, that's called 'Cross Sections'. Strand positions derived from NURBS surfaces or curves, that's called 'Follow'. And, procedurally generated strand profiles, that is 'Fur'. All three can be used in the same point cloud, if that makes sense.
On top of that, deformation compounds: curls, bend, turbulence, randomize, grouping...
At the end of the day, second, optional point cloud that fills the strands over the first one, but it also can carry deformations.
Under the hood, it's endless variation of famous 'Fill interpolated array' - or - 'Build linearly interpolated array' compound, creativity with geometry queries, something from Phil Pack, something from MT Strands....
... so, for more specific ICE tutorials, I would go to already written stuff, like MT Strand samples, Thiago's tutorials, so on.
Also, just common tutorials for every 3d software, about NURBS modeling, very simple math such as add, subtract, modulo, lerp, divide, multiply.... , basic rigging stuff, up vectors, direction constraints...
All stuff is created with XSI 7.01, using factory nodes, so it should work nicely with all versions above 7.01.
Download compounds and samples, here.
Cheers
Re: Kristinka C
Man, you are AWESOME! Thank you so much for all the effort, that you put in this.
Re: Kristinka C
Wow, best christmas gift 
Thank you very much for making this available for free.
Seems with this big a toolkit, we actually need hairdressing skills now
http://www.pxlshots.com/im...
Thank you very much for making this available for free.
Seems with this big a toolkit, we actually need hairdressing skills now
http://www.pxlshots.com/im...
softimage resources section updated Jan 5th 2024
Re: Kristinka C
Thank you guys
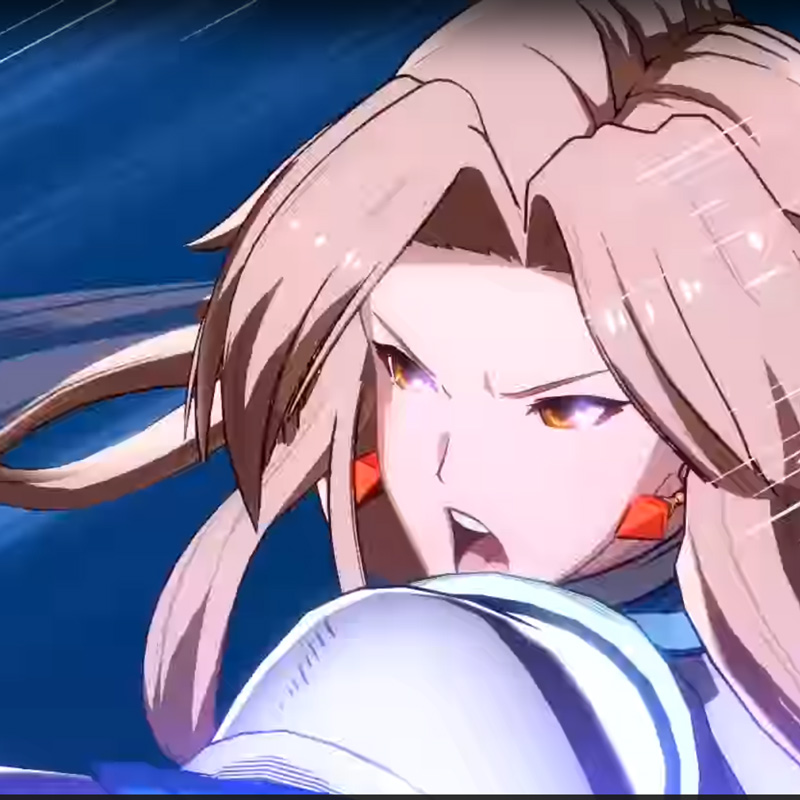
Well I'm primarily game artist, so most important hairdos for me, are something like in image. fairies, elves, so on... at least for now. Anyway, I've tried to avoid anything with a very high density hairs in samples, because Mental Ray become deadly slow on these areas, and tends to 'melt' shading of many hairs into one. Just be careful with heavy clumping, braids... Adding some randomness on these areas can help a bit.

Well I'm primarily game artist, so most important hairdos for me, are something like in image
Re: Kristinka C
Hi Anto,
I noticed a strange thing when using the hair color attribute in the render tree:
When the number of points exceeds a certain number (which seems to be different for every scene), the colors are garbled up when rendering (while they are fine in the viewport)
Here's an example (I appended the scene I used also)
First picture is Rate=10000 in the kH Strands SampleSet compound
Second picture is Rate=10001
I can't figure out what's happening, may be anyone knows what going on 
(scene: http://www.megaupload.com/?d=FFJXH31O)
Cheers,
Reinhard
I noticed a strange thing when using the hair color attribute in the render tree:
When the number of points exceeds a certain number (which seems to be different for every scene), the colors are garbled up when rendering (while they are fine in the viewport)
Here's an example (I appended the scene I used also)
First picture is Rate=10000 in the kH Strands SampleSet compound
Second picture is Rate=10001
- maybebug.jpg (107.75 KiB) Viewed 6340 times
(scene: http://www.megaupload.com/?d=FFJXH31O)
Cheers,
Reinhard
softimage resources section updated Jan 5th 2024
Re: Kristinka C
First that I see something like that, looks like some rounding issue. I guess it can help if you replace 'strands sample set' with the one in attachment - it has emission rate as a scalar value, just as original node.
strands sample set
By the way, I planning to post an 'service pack' to these compounds in a few days.
strands sample set
By the way, I planning to post an 'service pack'
Re: Kristinka C
Hi there, thanks a lot for your reply.
Afraid the new compound doesn't resolve the problem for me yet.
I just checked an old scene, the same issue occured with the old version of Kristinka.
Could be an ICE bug (?)
Reinhard
ps Service pack -- great! Looking forward to it. Wondering why your toolkit doesn't cause more buzz on the forums
Afraid the new compound doesn't resolve the problem for me yet.
I just checked an old scene, the same issue occured with the old version of Kristinka.
Could be an ICE bug (?)
Reinhard
ps Service pack -- great!
softimage resources section updated Jan 5th 2024
Re: Kristinka C
Little update: It seems to be a rasterizer bug. Same thing works when using scanline or raytracing. Too bad, seem there's no easy fix.
softimage resources section updated Jan 5th 2024
Re: Kristinka C
Here with 7.01, I had a lot of rendering problems when some, or all strand segments were at zero length. Such as broken final gathering, wrong shading normals, NaN pixels in case of Hair Geo shader, enormous use of memory in case of pHairTK shader...
...but really nothing that looks like a wrong ICE attribute in rendering. At last with these few attributes, used here. Fur and Hair render that I posted a few posts above, has about 70K strands only for fur, and it's rendered with rasterizer.
If it's possible to take analogy with that zero-segment-length problem, I would believe that there is a way to make Mental Ray's life easier, just by sending 'something other' to him - well, just now, I had no idea what is the solution.
Update will be mainly to fixing inconsistencies, redutant nodes, a bit more ways for preventing mentioned zero-length problem, so on.
Regarding popularity, perhaps people are waiting for plugin that gives them clear directions what to do, I expect response to know in which way to go . As it is for now, it's tailored around my own habits, which obviously isn't enough. Actually, it's a bit more popular, than I can support.
...but really nothing that looks like a wrong ICE attribute in rendering. At last with these few attributes, used here. Fur and Hair render that I posted a few posts above, has about 70K strands only for fur, and it's rendered with rasterizer.
If it's possible to take analogy with that zero-segment-length problem, I would believe that there is a way to make Mental Ray's life easier, just by sending 'something other' to him - well, just now, I had no idea what is the solution.
Update will be mainly to fixing inconsistencies, redutant nodes, a bit more ways for preventing mentioned zero-length problem, so on.
Regarding popularity, perhaps people are waiting for plugin that gives them clear directions what to do, I expect response to know in which way to go
Re: Kristinka C
Hi all
Regarding '10001 issue', for what I know for now, it's somehow related to emitter's mesh - some of meshes from v1.0 samples seems to working fine with 2010, for example 'Hair-from-Fur'. But animal model from 'Fur-Vector-Field', or 'Simulation-Fur' seems to be resistant to any strands setup, including setups done by factory nodes only. Funnily enough, I created these fur setups as an 'quick and dirty' solution for Christmas-time gigs, when it was almost impossible to meet the deadline by using Softimage's hair, and these setups were working just fine with my 7.01.
So update is a bit compromised. Fur stays the same, Hair is vastly changed to use simple emissions from NURBS surfaces, even without Generate Sample Set node. As usually, this is an advantage, and disadvantage. It's faster in interaction, I - guessing - because geometry queries have a shortest way for work, also setups looks more 'logic'. But it wouldn't be easy to shrink wrap NURBS surface around complex objects, that's a reason to keep NURBS emitters for hair only.
There are a lot of other improvements, clean ups, a few more options for splitting-grouping hairs, a few more nodes... everything, including updated tutorial, is ready, I'm pretty sure I'll post it tomorrow or day after. Sorry for delay.
Cheers
Re: Kristinka C
Hi,
Downloads for version 1.1 are:
Samples and compounds
Tutorial with support files
Tutorial online
Beside the changes mentioned in previous post,
The 'main' deformer is still 'Follow NURBS' - this time, it don't need NURBS surface to be too close to hair roots. Even it's a slower than CrossSections, because of lot of geometry queries for every strand segment, it also provides a lot of info for later deformations.
I've added one of these 'sub-deformers' in sample model called 'Follow-Two-NURBS-Offset-Curves', where main shape of hair is deformed by another layer of curves. It's a bit wild because it's double deformation, it requires yet another point cloud to work, but generally, it's something I tring to achieve from start: to always keep main shape of hair, together with deformation that respect correct layering of hairs.
'Cross Sections' has a cleaner interface, and now with single NURBS emitter, I believe it can be easilly used for other purposes than hair creation.
For general NURBS modeling, perhaps compound called 'NURBS UV Density" may be interesting, it's a very simple compound that allows sliding of NURBS surface along itself.
Tutorial is updated, also I've added a few more tips about shading, NURBS modeling, so on...
For anything related, don't hesitate to ask, nothing is set in stone with these ICE compounds.
Also I would like to say a BIG thanks to RRay for diving into this stuff - shame on me, I've figured out just before few days that this is the same RRay who made RCTools, which I continuously using from XSI 4.
Cheers
Downloads for version 1.1 are:
Samples and compounds
Tutorial with support files
Tutorial online
Beside the changes mentioned in previous post,
The 'main' deformer is still 'Follow NURBS' - this time, it don't need NURBS surface to be too close to hair roots. Even it's a slower than CrossSections, because of lot of geometry queries for every strand segment, it also provides a lot of info for later deformations.
I've added one of these 'sub-deformers' in sample model called 'Follow-Two-NURBS-Offset-Curves', where main shape of hair is deformed by another layer of curves. It's a bit wild because it's double deformation, it requires yet another point cloud to work, but generally, it's something I tring to achieve from start: to always keep main shape of hair, together with deformation that respect correct layering of hairs.
'Cross Sections' has a cleaner interface, and now with single NURBS emitter, I believe it can be easilly used for other purposes than hair creation.
For general NURBS modeling, perhaps compound called 'NURBS UV Density" may be interesting, it's a very simple compound that allows sliding of NURBS surface along itself.
Tutorial is updated, also I've added a few more tips about shading, NURBS modeling, so on...
For anything related, don't hesitate to ask, nothing is set in stone with these ICE compounds.
Also I would like to say a BIG thanks to RRay for diving into this stuff - shame on me, I've figured out just before few days that this is the same
Cheers
Who is online
Users browsing this forum: No registered users and 30 guests