Add Preview Pose
Posted: 08 Oct 2016, 20:48
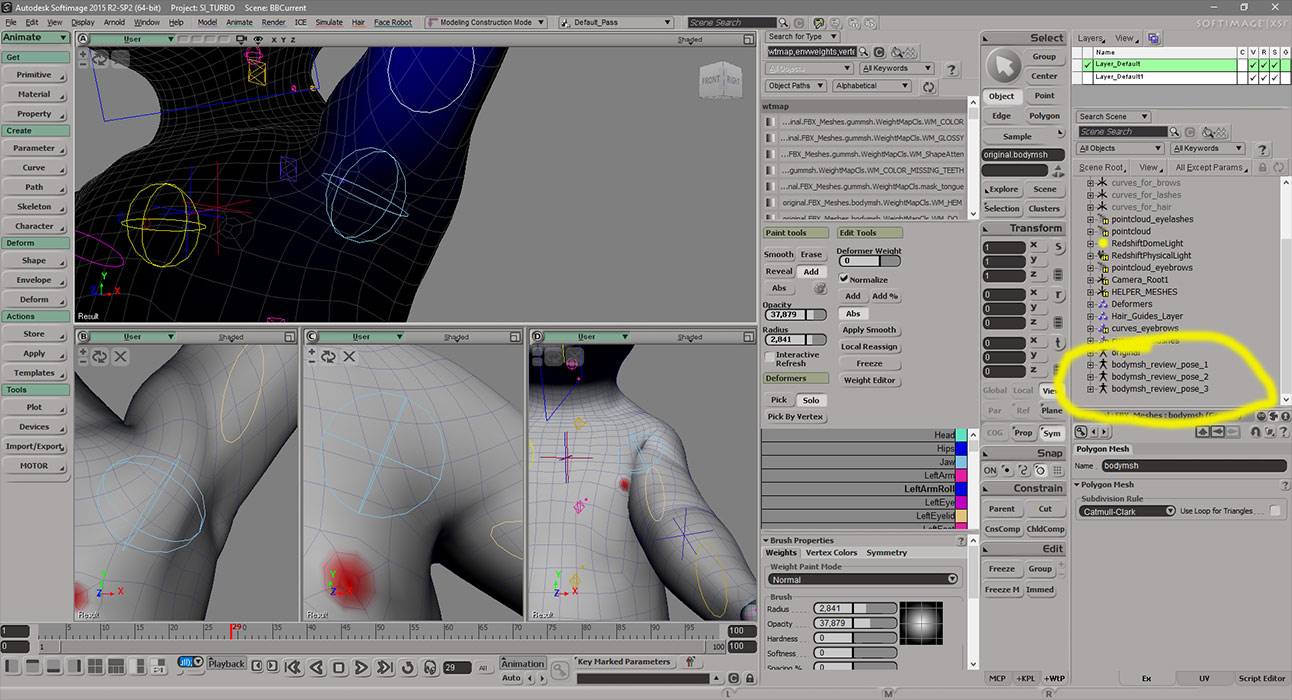
Finished this plugin today. Might be helpful if you're doing detailed weightpainting or tweaking the model for envelope deformations.
//
// "Add Preview Pose" - a helper plugin for weight painting and modeling for animation
//
// Author: Reinhard Claus / website: http://rray.de/xsi
//
// "Add Preview Pose" adds something called a "preview pose" for a model (master).
// You do modeling changes (including topo changes), weight painting or shape edits
// on the master as usual.
// The "preview pose" lets you immediately see the results on one or several differently
// posed models inside other viewports.
//
// The plugin creates these menu items in the sidebar's edit menu:
//
// "Add Preview Pose" uses the current pose of the model for the new pose,
// "Add Preview Pose from Base Pose" uses the base pose.
// "Preview Pose zero out" set the Preview pose to the neutral position
// (XSI's "Reset Actor" doesn't work because there's no real envelope op)
// "Preview Pose from Master" set the Preview pose to the master
// "Preview Pose to Master" set the master to the Preview pose
//
// Usage: * Select an enveloped mesh (must be part of a model)
// * Select "Add Preview Pose"
// * Branch select the original model, call "isolate selected"
// * Branch select the new model, call "isolate selected" in a different viewport
// * Repeat as needed
// * Pose all models as you wish
// * Model/paint on the master (=first mesh you selected)
//
// What happens behind the scenes: The model with the rig will be duplicated, the mesh will be
// replaced by a clone of the master mesh. The clone will have a shape key with the base shape,
// this will be used to reset it to base pose using ICE. After that an ICE envelope operator is
// applied to the clone.
//
// Tip 1: the Preview objects meshes (marked blue) shouldn't be directly edited
// Tip 2: You can delete and create Preview poses at any time
// Tip 3: The 3 pose change commands won't work well if you have a custom rig/controllers contraining the
main bones
// Tip 4: If you use a weightmap named "WM_DQ", this will be connected as the dual quaternion weights
//
